Teaching MSSQL to PHP

These are more of a collection of links than an actual tutorial; my personal experience with installing MSSQL drivers in a PHP/Apache webserver was born out of the need to migrate timekeeping data from a proprietary 3rd party database into one of my own.

You’ll need the following pre-requisites downloaded:

  1. MSSQL (2012 is tested)
  2. PHP 7 (7.2.5 and 7.2.9 is tested)
  3. (optional) To test MSSQL connection: DBVisualizer
  4. MSSQL Drivers
  5. PHP JBDC Drivers

Procedure

Instead of writing my own installation steps, I followed @nahomt‘s tutorial. In case that link isn’t available, serverpilot.io has another tutorial that looks similar.

Reading your Fingertips

This is directly related to my previous post, Diving into a Digital Persona.

After playing around with Cython and fprint in Python3’s terminal, I found some combinations of commands that provided meaningful (and cool) results.

Initializing the device with the following code…

import fprint
fprint.init()

… should prepare the program to accept commands. The first step is to tell the library to find available devices, and is done with…

devices = fprint.DiscoveredDevices()

Now the devicescode> variable hopefully has an object containing the available devices. Unless you have more than one, the following code should put your device object into another variable:

devices = devices[0]
device = fprint.Device.open(devices)

… and now device is assigned to the device, ready to accept commands!


The following snippet should save a binarized file to a user-defined location:

fingerprint = device.capture_image(0)
fingerprint = fingerprint.binarize() // optional
fingerprint.save_to_file('/tmp/fingerprint.pgm')

A file in your /tmp folder should appear. This is not fingerprint data that can be read by the library, but merely a graphical representation.


To get the actual, comparable fingerprint data, the following commands are needed:

(fingerprint, image) = device.enroll_finger()
fingerprint = fprint.PrintData.from_data(fingerprint.data)

From what I understand about this is that the fingerprint is converted into machine-readable data from predetermined points on the print, and then the data saved to memory.

Actually comparing fingerprints require the following commands:

(result, img) = dev.verify_finger(print_data)
 print(result)

Where result is either true or false depending on whether the fingerprint was previously enrolled or not.

Diving into a Digital Persona

For convenience, security, and effectivity, you’d be hard-pressed to find a better alternative than a biometric reader for the purposes of identifying an individual.

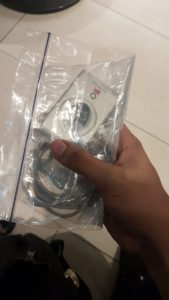
I’ve recently come into possession of the U-are-U Digital Persona 4000B Single Fingerprint scanner. A driver pack and/or software development kit (SDK) is a bit of a challenge to find, as most (at the time of writing) are tucked neatly behind paywalls, and with good reason; translating an image of a fingerprint into data is not the simplest of tasks. There seems to be, however, an open source solution (but we’ll get into that later).

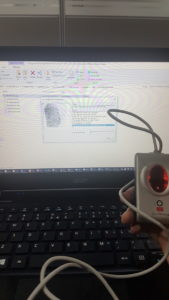
Plugging the device into a Windows 10 computer only flashes the built-in LED built into the interior of the unit. Official drivers, SDKs, and sample codes offered by the website of Digital Persona require payment, but after some research, a free alternative can be downloaded at neurotechnology.com [mirror]. Another, open-source solution is found in the form of iamonuwa’s github repository.

After downloading and installing the relevant files (the Setup.exe files in each download’s subdirectories), the LED stays steadily on, indicating that the device is ready to start reading some fingers.

Using the included code samples the reader works just fine, but as a web developer, the main issue I found is the absence of a web-ready interface between the device and the API the device was intended for. Code samples include C#, C++, Java, and Visual Basic which I believe none of which are currently considered “web” languages.

Noticing that the included code samples are primarily proprietary languages, some research was done for the open-source side of this device.

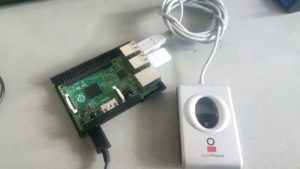
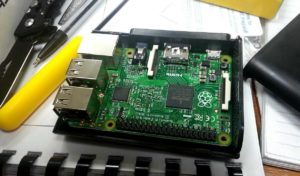
A little progress has been made when plugged into my Raspberry Pi: the libraries are readily available on the official repositories. A simple sudo apt-get install libfprint fprintd fprint-demo got me the demo program similar to the windows demos above (but with a lot less searching, might I add).

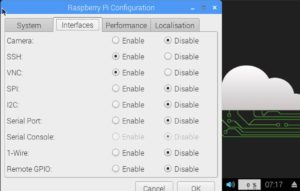
After confirming the device works, with fprint-demo, my next step was getting it to accept commands without using a GUI. I opted instead to use Cython since I have no experience in C languages. This allowed me to use another Python library: fprint.

There were a few little humps when installing Cython; the Raspberry Pi needed a python update (sudo apt-get update python), cython didn’t like to be installed with pip but preferred pip3 (pip3 install cython) and fprint itself also preferred pip3 (pip3 install fprint).

fprint is written in C, but Cython has provided the compiler that allows Python to use the C library. Using the code taken from gtors/fprint repository, the fingerprint reader responds, and the enrolling and verifying functions are available for use. The following code is taken from gtors/fprint and includes an enroll and verify function:

import fprint
fprint.init()
ddevs = fprint.DiscoveredDevices()
if len(ddevs) > 0:
    ddev = ddevs[0]
    dev = fprint.Device.open(ddev)
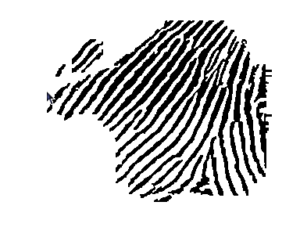
    (print_data, image) = dev.enroll_finger()
    print_data = fprint.PrintData.from_data(print_data.data)
    (result, img) = dev.verify_finger(print_data)
    print(result)
    assert result is True
    dev.close()

help(fprint) should display the specifications of the library, but for the basic reading and displaying of fingerprint data: applying inspect.getmembers(print_data) returns the print_data object, along with that I can only assume is fingerprint data presented in blob or binary form.

All that’s left to do is to save the data from print_data into a database, and possibly query that with any future input from the reader!

Raspberry Pi – A Thing on the Internet

Imagine having a computer that could fit in the palm of your hand. Granted, it won’t be very fun to use as a workstation, but having a portable, programmable processor with an internet connection does have it’s applications.

The model I have is the 2B – the latest at the time with a whopping 1GB of RAM, and four 900MHz cores of fury. It boasts a native HDMI connection, a microSD slot, four USB ports, serial pins, and a myriad of other goodies that are all compacted and powered by a 12v 5A microUSB plug.

Installed on it is the June 2018 version of Raspbian: a raspberry-specific distribution of Debian, and right after a fresh install (and connecting the prerequisite hardware), you’re greeted with a friendly-looking desktop with a dialog box showing you a first-time setup wizard.

Completing the steps, I proceeded to open up the settings and enable a few options that allows for headless (remote) operation.

Using the Preferences->Raspberry Pi Configuration window allows you to easily enable different ways of connecting to your microcomputer: SSH and VNC being easy and convenient.

The dawn of a new blog

What’s a web developer without a website?

Consider this my hands-on study of WordPress, as well as a journal for experiences deemed share-worthy by myself, friends and family.

Stay tuned for updates!